Many people think that TIG welding is one of these complex forms of welding that is just too expensive to learn. Only one of those assumptions even holds a bit of truth though. It is true that TIG welding can be expensive – if you’re looking at the incredibly expensive TIG welding machines that companies try to sell. There is no need for a new, inexperienced welder to purchase a 1000$+ TIG welding machine – they likely won’t know what all of the bells and whistles on the machine are used for. The good thing is that there are plenty inexpensive TIG welding machines on the market that will do more than fulfill the need of a newbie. These machines are great at welding various different types of steels and alloys; all you have to do is search and you’ll likely be able to find a machine that fulfills your needs.
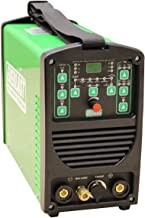
For the price, this TIG welder is really all that you can ask for. The Everlast PowerARC is surprisingly lightweight when all of its capabilities are considered. Its lightweight design allows it to be incredibly portable and provide its owner with a fair amount of power. This is a great option for those individuals who are interested in both TIG and Stick welding. The fact that it has the capability to double as a stick welder is one of the reasons why it provides it users with such an immense level of value.
Aside from its ability to double as a stick welder it also features IGBT infineon modules, inverter technology as well as has a dual voltage capability. If you’re one of the people who worries about your machine breaking down before it’s supposed to worry no longer – Everlast gives every person who purchases this welder a 5-year warranty.
Pros
Doesn’t have a foot pedal but is lift start capable
Runs for 6-hour intervals
Functions as both a stick and TIG welder
Runs off of both 110 and 220 V
Cons
Doesn’t work as an AC welder
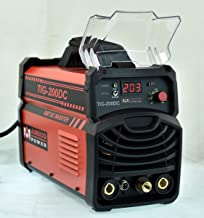
AMICO 200 AMP TIG Torch/ARC/Stick DC Inverter Welder Dual Voltage IGBT Welding
This and the previous model may seem very similar but, they have very distinct differences. This model features an onboard inverter as well as other, extra features that you typically don’t find with a welding machine such as: a work clamp, electrode holder, 13-foot cable. This dual voltage welder also works with both 110 and 230 V.
Typically, when you find a cheap welding machine you assume that the weld it produces will be subpar. The great thing about this machine is that it manages to produce clean, spatter free welds – welds that you sometimes don’t even find on the higher priced machines. This 200 Amp machine welds all types of materials, from steel, mild steel, copper, and stainless steel.
Pros
Gas line included
Lightweight
Portable design
Fully extendable
Cons
Isn’t flux core
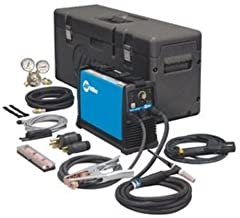
TIG Welder, DC, Maxstar 150 STL
The Maxstar 150 is designed to deliver awesome functionality in both the areas of performance and versatility. It can be used on a number of different metal types and can also be switched between both stick and TIG welding modes. Aside from those abilities, it’s also known for being incredibly portable (it weighs roughly 13.7 lbs and comes with a shoulder strap which makes it relatively simple to move around).
Aside from that it also has thermal overload protection, which means that it’s fans essentially reduce both it’s heat and power consumption. The Lift-Arch technology Miller included in this welder’s design also allows welders to work on both low and high frequencies without causing motor damage.
Let’s also not forget that this welder also has an open circuit voltage option which allows the welder to be run continuously and during specific times when necessary.
Pros
It’s incredibly portable
It comes with a remote control which can adjust the welder from more than 5 feet away.
It’s easy for both beginner and advanced welders to use.
It gives you a choice of choosing the right voltage
Cons
When used at high outputs there may be power fluctuations
It doesn’t work well when used on thicker pieces of metal
It doesn’t come with all the power tools you may need
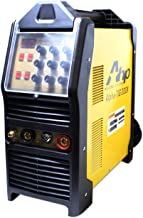
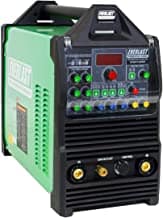
AHP AlphaTIG 200X
The AHP AlphaTIG 200X can be used for welding a number of metal types but works incredibly well on metals like Aluminum and Stainless Steel. This welding machine can be used to produce precise, thin welds on various metal types and can weld Aluminum up to 1/4″ thick and Steel up to 3/8″ thick.
Pros
It has advanced inverter technology
There are both 2T and 4T modes
You can use it right out of the box
It has adjustable output frequency
It offer excellent arc quality
Cons
It has has fans that tend to make quite a bit of noise
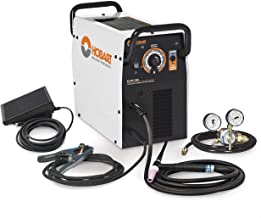
Hobart 500551 EZ-TIG
The Hobart 500551 EZ-TIG comes with an easy-to-use interface (hence the name EZ-TIG). All you need to do is power the welder up and select the material you want to use the welder on. It also has a Fan-On-Demand function which allows one to run the fan once it’s needed, which allows you reduce debris and the dust it draws in.
Aside from that, it also has the ability to weld 22 gauge up to 3/16″ thick as well as the ability to switch between DC and AC. It also has the ability to eliminate tungsten and other material contamination through it’s HF start to permit non-contact arc start.
Pros
It has an easy-to-use interface
It has a high temperature shutdown function
To allow for more consistent welds it has infinite amperage control
It has auto-postflow which allows for optimum shielding based on the welding amperage without requiring adjustment or waste.
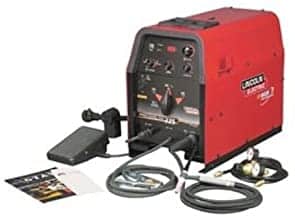
The Lincoln Electric Precision TIG is a more expensive TIG welder. It is incredibly efficient and is actually designed to deliver enhanced performance. Aside from that the Lincoln Electric Precision TIG welder can switch between both TIG welding and stick welding modes. It also features MicroStar Technology which allows the welder to deliver a low amp start as well as stability during the welding session.
The Lincoln Electric Precision TIG 225 K2535-2 also features an AC auto balance function which allows it to provide higher levels of penetration and cleaning.
Pros
It can complete a duty cycle at low voltage
It can be adjusted for any situation with penetration, cleaning, and pulse modes
Easy to customize design
It has an easy to use interface
F.A.N. reduces power consumption noise, motor wear, prevents overheating.
Cons
It’s a relatively expensive machine
Everlast PowerTIG 250EX
The Everlast PowerTIG comes with a five-amp start for DC and AC low amp operation. This welding machine is incredibly lightweight and portable while also having the ability to be used in a number of welding settings. It has settings that can be adjusted for 2t / 4t operation. Aside from that the Everlast PowerTIG 250EX also features high pulse frequency capability which helps reduce overall heat input and prevent burning or warpage from occurring.
The Everlast PowerTIG also features a 240V receptacle that’s built in and specifically designed for utilization with the Everlast PowerCool 300 water cooler.
It features an improved HF start circuit which reduces maintenance issues
Cons
This welder isn’t designed to weld thicker metals
How do you choose your first TIG Welder?
Video credits to Miller Welds. It discusses how to buy your first TIG welder.
Who says you have to spend thousands of dollars to get a high-quality machine. The machines on this list will likely fulfill all of your welding needs – unless you require a foot pedal or some other higher end welding capability.
We know the thought of taking that first step into actually signing up for your welding courses can be difficult. We’ve been there, we know the pressure that comes with committing yourself to learning a trade as involved as welding the thing about it is that it isn’t the hardest trade in the world to learn, if you take the necessary precautions. Just like learning anything else, learning to weld is as simple as embodying the things that make up a good welder. It’s about working your butt off every single day to engrain the processes that are involved in welding into your mind.
Is Welding School Hard?
This video goes over advice for starting welding classes as well as gives an overview of what to expect when you begin taking classes.
https://youtu.be/5dBnkhApPoQ
Is welding worth it?
The first thing that many people neglect to take into consideration when they begin to weld is the fact that learning takes time. You aren’t going to pick up your first welding machine, load it with filler and be the best welder in the world. That isn’t how it works.
There are various approaches that students take when it comes to welding. The key is making sure you are determined to learn and get better at welding. Without that determination you won’t be able to stick through the hard parts of the process and reap the fruits of your labor
How to make welding school easier
1. Learn hands on
As with most activities that require motor skills welding is something that is best learned through actual practice. You have to weld and actually make mistakes in order to understand what you should and shouldn’t do when you’re welding- that’s really the only way to learn to weld. Make sure that the area you choose to learn in (school) is packed with welding equipment rather than going to a place that puts emphasis on teaching you theory.
2. Have good teachers
Having a teacher that actually knows what he or she is doing is a key component to eliminating the learning curve that typically comes with welding. Make sure that when you choose your teacher that he or she has both a skill for the trade and actual hands-on experience performing the art of welding. If they don’t possess both of these qualities, then you will likely waste both a fair sum of money and time learning from someone who doesn’t know what they are doing.
3. Work outside of school
You can’t just step into the classroom, do some work, leave, and expect to be good at welding. If you want to be good at welding, you have to live and breathe the trade. You have to do work outside of your allotted time in the classroom; you have to be fully committed to the act of learning to weld. This means that you’ll be taking on outside projects and rehearsing the same activities over and over again until you get it. Also don’t think that you’ll just get your certification and be finished learning, you won’t be. You’ll have to constantly get updated on new welding processes as well as keep yourself knowledgeable about the old ones. It never stops.
4. Be patient
As the aforementioned processes suggest you’ll have to put in actual time in order to get good at welding. It doesn’t happen overnight. With that in mind, you’ll have to focus on the progress you’re making as a welder rather on the things that you’re messing up on during your time practicing. It’ll make everything much simpler in the long run.
5. Have good supplies
A welder is only as good as the supplies he/she keeps. You can’t expect to produce good welds if you are using subpar materials. If you want top of the line welds, as well as want to be protected, you have to make sure that you have everything you need. If you want to know about the best gear on the market right now, click here. We have compiled a list of all of the best helmets, welders, gloves, etc. in order to keep you safe and efficient.
So, does this make welding school worth it?
Well (and this answer may not apply for all) let’s ask Adam Leese.
What good is a review of Welding Torches or Plasma Cutters if you don’t understand why you would need either of them in the first place?
Both of these pieces of equipment serve their own individual purposes, to cut metal. Before you go out to purchase it’s important that you make careful calculations that will allow you to make the most out of the equipment of your choice. Remember, both Plasma Cutters and Welding Torches have their own unique benefits, costs, and supplemental safety equipment that come along with using them.
How to choose whether to use a plasma torch or a welding torch?
Do you require a tool for only cutting or do you also require a tool for brazing, heating, or welding?
What types of metal do you typically cut?
What’s the thickest metal, you ever see yourself cutting with the tool?
Video explaining difference between Oxy-Acetylene Torches and Plasma Cutters
What is a Plasma Cutter?
To answer that question, we should know a bit about the material plasma. Plasma welding is a process that uses an ionized gas (or plasma / electricity or energy in an electricity neutral gas such as compressed air). The elements mentioned in the parentheses (electricity neutr.al gas and electricity) are forced through a nozzle and electrode which makes the (at this time just gas) become imbalanced and. into plasma.
When do you use a Plasma Cutter?
Choosing when. you use a plasma cutter (or the type of cutter you need) depends greatly on a few things such as:
Plasma Cutters are used to cut and gouge, on average materials with a thickness of an inch.
Benefits of Plasma Cutters / Using a Plasma Cutter
All that many understand about plasma cutters is that they cut metal; many don’t know that there are also a vast number of benefits to working with a plasma cutter.
The benefits of using a plasma cutter are:
They’re becoming more and more portable with improvements in inverter technology.
Are very precise with their cuts and require very little clean up (little slag and narrow kerfs)
When you use a plasma cutter under water there is very little heat exposure and very little noise.
Plasma cutters tend to cut quickly.
Plasma cutters can cut non-ferrous material such as cast-iron, aluminum, and stainless steel.
Plasma cutters tend to cut faster on thinner metals.
Disdvantages of using a Table Plasma Cutter:
The upfront investment of plasma cutters is a bit much relative to oxy-acetylene torches.
There are safety hazards associated with using a plasma cutter (as with anything)
What is Oxy-Acetylene Welding/Cutting?
Oxy-fuel welding is a process that uses a fuel gas to cut metals. It was first used in 1903 and was done by using a welding torch. In the process the flame temperature is increased using pure Oxygen which helps the metal you’re cutting melt locally.
For Oxy-Acetylene cutting in particular the torch is used to heat the metal up to what is called it’s kindling temperature. After that, an oxygen stream is trained to the metal, which burns it into a metal oxide and flows out of the cut as slag.
Benefits of Welding Torches?
The most common type of welding torch is the acetylene torch and it uses the a combination of oxygen and gas to develop the heat that will be used to cut the metal. There are several benefits to using an oxy-acetylene welding torch but the most reasonable one is the fact that they are incredibly portable and much less expensive than other equipment that’s used for cutting metal. The portable design of welding torches makes them incredibly versatile and gives them the ability to be used on a variety of different tasks that require metal working such as pipe fitting and motorcycle building.
Differences between Oxy-Acetylene Welding Torches and Plasma Cutters
Function of Plasma Cutters and Welding Torches
If you’re planning on using a welding torch you have to make sure you’re going to have the time you need to be able to cut properly. There is also a bit of preparation that comes into play when you’re using an oxy-acetylene torch, such as the preheating of the metal. You’ll also have to make sure that of things such as:
The gas you use (because the gas has a direct effect on the quality of the cut) is very important to pay attention to.
On the other hand, plasma cutters are able to cut through metals a bit more efficiently than welding torches do. This means the cut provided by plasma cutters is both faster and cleaner than that of a traditional welding torch. You also don’t have to worry about preheating a plasma cutter because of the hotter wave of heat that you’ll encounter when using them.
Prices of Plasma Cutters and Oxy-Acetylene Welding Torches
Depending on how active you are with your metal work, the prices of either of these tools will work fine. For example, if you tend to go through a decent amount of metal in a period then it makes sense to purchase a plasma cutter because of all of the savings you’ll receive. We don’t want to forget that with a plasma cutter you’ll be required to pay a bit more up front than you would with a torch (you would have to pay for things such as the gas). If you don’t cut as often as others a simple welding torch may be all you need to get going.
Here are the prices and relative specs of both plasma cutters and oxy-acetylene torches.
[table id=97 /]
*note: don’t compare each price side by side – this is just to give you an idea of the costs of each piece of equipment. And the number of products was chosen so you could have a broader view of the price of each product.
In conclusion, there are quite a few benefits to using either of these tools. The trick is to find the piece of equipment that will work for you both today and tomorrow. And as always, let us know if you have any questions.
A typical question that we get when it comes to welding mild steel is whether or not it can actually be welded. The short answer to that question would have to be, yes. It can be welded.
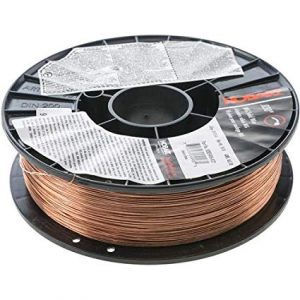
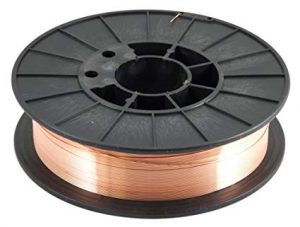
There are 2 basic types of wire that one can use to weld mild steel. On the one hand, we have ER70S – 3, an AWS classification. This type of wire is mainly used for all-purpose welding. The thickness of the welding wire that you decide to use will really depend on the type of material that you’re welding. A good, kind of neutral material to use would likely be a .03-inch diameter wire – it would be great for welding metals of a wide range of thickness and purpose.
Welding Positions: an all position wire that supports single and multi pass welding
How do you know if you’re welding mild steel?
For all intents and purposes mild steel can simply be regarded as steel with a very low amount of carbon in it’s makeup. It’s a very simple material to form and is also very common when it comes to MIG welding.
How do you choose a brand for welding wire?
The first thing to make sure of when you first start even considering purchasing welding wire is the quality that you want. If you want a high quality welding wire then you will likely require wire that meets the AWS standard for welding wire.
The AWS standard requires that wires meet a certain level of thickness and have a certain degree of tensile strength.
Where do you store welding wire?
Again, if you think it’s a good idea to buy welding wire then you likely understand that you will need a place to store it.
The most important thing to keep in mind when you’re looking for a place to store your welding wire is that it’s protected from the harmful material in the atmosphere. Keep your wire out of damp environments as this will cause it to oxidize and likely be rendered unusable over time.
The reason that you want to make sure your wire is protected is because it will likely not be possible for it to work correctly if it’s faulty and installed back into your welder. Faulty or rusted wire will likely lead to welding failure in the future.
How do you choose the right size for your welding wire?
There are really only 3 things that you want to make sure you pay attention to when sizing your wire.
You want to pay attention to is the size welding wire that your machine can take.
You want to make sure the wire is the right wire for your machine. Don’t buy flux core wire if you’re using a MIG welder.
Make sure that the wire you use has a thickness that is proportionate to the material that you’ll be welding. If you’re welding a thinner metal, then you likely want to make sure that you use a thinner wire. Vis Versa for thicker metals.
Many think that the most important part of the welding process is the actual welder. We’re sorry to tell you this but, it’s not. The accessories that you have are a key part of keeping you in the game when it comes to welding – we just tend not to think about this important fact. Why do we say this? Have you considered the effect that any welding process would have on your eyesight if you didn’t have a pair of welding goggles? Or even a mask?
This guide will introduce you to the factors that should be considered when you begin your search for welding gear.
What factors go into buying welding accesories?
Where are you going to be welding?
A factor that many simply don’t take into consideration when they begin searching for welding gear is the actual place where the welding will be done. The gear you bring when you’re in a welding shop is completely different from the gear you’ll need if you’re doing the welding outside surrounded by other individuals. What do we mean? Well, if you’re in an actual welding shop, then they will likely have the necessary equipment to keep others safe from the hazards accompanied by welding – there will also very likely not be as many people in the surrounding areas.
If you’re outside you’ll likely need to buy your own welding curtain or something of the like to keep others safe from your welding.
Video credits to Howcast. It goes over a way to set up an indoor workshop to weld in.
What welding process will you use?
There are various different methods involved in welding, each of which involves different types of accessories. For this guide though, we will stick with gas welding – an activity that requires ventilation masks so the wearer doesn’t deal excess damage to their lungs.
Size of the item / welding space
As a prerequisite one should always consider the size of the item they are considering purchasing. If it doesn’t fit, then you will likely not be able to enjoy the benefits that it’s meant to provide. Outside of the wearable products one should consider the space they have available for the item – this is another major consideration to keep in mind when it comes to the size of the item. If you purchase an item that it is too large for the available space then you will have to go through the process of switching it out and returning – it’s probably best that you measure the space you have available before you decide to purchase anything.
Durability
Of course, you’ll want to make sure that whatever you’re purchasing is going to be able to stand the tests of time (and excessive use). The best way to do this is to pay a great deal of attention to the type of materials that the equipment is made of. Another easy way would be to look at comparison reviews of the item you have in mind – this is an easy way to gauge the longevity of an item in comparison to another equally valuable item.
Budget
Regardless of your income you want to make sure that the item you purchase will be able to fit inline with your budget. For the majority of welding accessories (unless you purchase the best items available, in which case you have to expect to spend a pretty penny) you won’t have to spend a ton of money. In fact, on most of the items you can expect to spend surprisingly small sums of money.
What type of Welding Accessories
Facial Protection
If you don’t have facial protection, then you likely don’t understand how dangerous welding can seriously be. Despite the exposure to harmful gases and bright lights, you have to worry about a whole plethora of other potential hazards (hazards that we will discuss in another post). Now, to avoid these hazards it’s probably best that you purchase equipment to keep you out of harm’s way.
Safety Goggles
There are various names for them but, for the most part they are known as welding goggles. These handy little tools are the key to making sure that your eyes are safe from sparks and any debris that your face may come into contact with during the process. These tools are also very good for keeping gasses out of your eyes during the weld as well.
Welding Helmets
Some people think that getting a pair of welding glasses is all that you need in order to stay safe – we’re here to say that there is literally no truth in that. A pair of welding goggles will keep your eyes safe but, a welding helmet will keep your entire face safe.Welding helmets keep the skin on your face safe from shrapnel and from the possible damage the gases can have on your face.
*the above photos gives examples of injuries that when the body is unprotected near a blast site / combustible objects / flying objects and welder’s flash.
Hand Protection
While all welding gloves are simply called “Welding Gloves”, they are all made with different purposes in mind. There are gloves made specifically for TIG, MIG, and Stick welding. Each of which will be broken down in subsections.
MIG: MIG welding is a process that is known for producing a fair amount of splatter as well as for generating a decent level of heat. Aside from this, MIG welding is also known for giving operators more dexterity since users are able to operate a welding gun equipped with a trigger that ca activate / deactivate the process. For this reason, many MIG welding gloves are made of denser leathers that are capable of handling more heat.
TIG: TIG welding has been said to produce much less heat than MIG which implies that one should be able to use much thinner gloves.
Stick: Much like MIG welding stick welding is an activity that is known for producing a high level of heat – which means that the gloves one uses must be relatively thick and capable of preventing your hands from being burned.
Protecting the torso
Aside from welding gloves other parts of the body, mainly the torso, will need to be protected. The common accessories made to protect an individual’s torso are aprons and jackets, as these are the objects that will provide the most protection for this part of your body. When purchasing either of these accessories it’s important to pay attention to the materials that they are made of. Much like the MIG welding gloves that we discussed in the above section, you’ll want to make sure the welding gloves you choose are designed from a thick leather – otherwise they will get burned through and won’t help much (since they’ll expose your hands).
Ventilation
When you’re TIG welding, you want to make sure that you have respiratory equipment, aka breathing masks and things of that nature. If there isn’t proper ventilation in the area that you weld in then you will likely inflict permanent damage on your lungs (something that no one wants to happen).
There are various different pieces of equipment designed specifically to provide respiration while welding – each of which will be covered in a later review by us.
Welding Shield
As we mentioned earlier in the review, it’s imperative that you make sure to purchase a welding curtain of some sort if you weld in a completely open space. This will make sure that your welds aren’t causing immense damage to those around you.
The purpose of this guide is to inform you of the specific materials that you’ll need (and are commonly used) to continue to weld efficiently. Depending on the type of welding you’ll be engaging in you’ll need different things – but that’s what we’re here for, to make sure you make the most informed purchasing decisions.
Like any profession there are things that separate the good from the bad in welding. These are general characteristics that all of the good welders have in common. Make sure to read through this guide with an objective in mind – don’t begin to compare yourself to these characteristics just yet. Wait till the end of the guide and then see what you have and what you need; we’ve found this to be the best way to really get a feel for what will help you in your welding career.
List of Welding Skills
Welding Skill #1: Ability to communicate
Again, as with any profession, the ability to communicate is key. When it comes to welding it helps mainly because of the effect that it can have on the learning curve. Welding isn’t an activity that many people just “get”. It takes effort, and understanding of who (or what) your support systems to make sure you get through the headache that is welding. If you’re involved in some form of welding education program, it helps to communicate with the professors there – it’s all about making sure that others have an understanding of what you need. If no one knows, then nobody can help you with what you need help with.
Welding Skill #2: Critical thinking skills
Welding is one of those activities that require a fair level of critical thinking skills in order to really be able to succeed at. Why? Well issues will constantly come up when you’re welding. Whether it’s a matter of not understanding why your welds are coming out a certain way or figuring out whether some person on a forum actually knows what they’re talking about – you have to be able to think about it objectively and figure out what’s up.
You’ll be surprised at the carryover that your ability to think critically has on your ability to weld and create functional items.
Welding Skill #3: Aware of surroundings
As you’ve likely guessed by now welding is not a harmless activity. It’s one that can and likely will inflict a fair amount of damage on you if you aren’t incredibly careful (and aware). Spatial awareness matters because you need to be aware of the exact place that you put every single item you use to weld. Not only is welding by itself a dangerous activity but the places where welders work can be incredibly dangerous. Places such as construction sites can be incredibly dangerous to those who decide not to be aware of exactly what’s happening around them.
Welding Skill #4: Steady hands
For obvious reasons, steady hands are of the utmost importance when it comes to welding. The ability to lay precise and evenly sized beads is the difference between an attractive and functional weld and a not so attractive and likely dangerous weld. Not only does not having steady hands reduce the aesthetic qualities of the weld but it can also make the welding process incredibly dangerous. Think about what happens when there is a high level of heat, metal splatter, and a person whose hands are shaking to such a pint that it makes the welding splatter even worse. Things get incredibly dangerous and likely very painful.
You wouldn’t think this, but welding is a physically taxing activity. This is mainly because of the fact that you will not only have to handle the welding equipment but if it’s your profession you’ll probably have to move a bit of other equipment – this can put a lot of stress on the body. Not only is welding an activity that requires the body to be able to handle the physical stress that we place on it while doing so but it also requires the mind to be alert. Depriving yourself of sleep can result in a deficiency in any of the above things – so make sure you get some.
Aside from those benefits mentioned above, a welder would also need to have:
Decent depth perception
Ability to maneuver hands (manual dexterity)
Muscle strength to move a solid amount of weight
Hand-eye coordination
The ability to work in less-than-perfect conditions
Welding Skill #6: Mentally capable
Not to sound harsh but, considering that having the ability to think critically is one of things included on this list, it makes sense to for the person who will be welding to mentally capable of handling the welding gear. Now this is a very broad characteristic but, as you read the bullets below, it will make a bit more sense.
Not only that, but welding has a fair number of administrative tasks that are typically included. This is another reason it’s important for a welder to have decent mental capabilities.
Administrative tasks include (but aren’t limited to)
Time management skills
The ability to communicate with others
Documenting work that’s been completed
Ability to meet deadlines
Be reliable
The ability to plan projects
Welding Skill #7: Good at math
Having fairly decent mathematical ability is a common trait because of the hidden math in the entire welding process. Knowing the thickness of your wire or the amount of gas you may need (if you’re not gasless welding) is important. To be able to understand these things, you’ll need to know how to do basic addition and subtraction (don’t worry you won’t have to be a mathematician to weld).
Aside from the basic math skills a welder would need you’ll also need to know these things:
Welding Skill #8: Must be able to learn new things
One skill that is of the utmost importance for a welder or trainee is the ability to learn.
Throughout the years, one is going to learn a few types of welding, such as stick, TIG, and MIG, essential techniques for doing a few different types of welding joints, the variety of shielding and welding gasses there are, and a plethora of other things.
The technology used in welding is going to always change just like the best practices used in welding are always changing. To be considered a great welder, one will have to constantly learn new things, especially when they are just beginning to weld – not to mention that it’s considered healthy to always train and learn more using professional development courses once one actually becomes a professional.
These 8 skills are things that every efficient welder tends to have in common with one another – and it makes sense for this to be so. For you to be efficient (and safe) while welding you must be aware of those and the things that are around you. This is a prerequisite of proficiency in a welding atmosphere. Now is the time to look at the qualities you hold and figure out what’s missing. Remember, the goal is to be an incredibly efficient welder.
MIG or Metal Inert Gas welding is the process of welding pieces of metal together using a current of electricity . It is usually considered the easiest type of welding for one to start out engaging in only because of the somewhat straightforward nature of the machine’s functionality.
What’s the history of MIG welding?
MIG welding otherwise known as GMAW welding was first developed in the early 1940’s. As mentioned in the above section it is the process of using an arc of electricity between a positive and negative (anode and cathode) to form a weld. The heat necessary to weld the metals together is produced by both the arc and inert gas involved in the process.
MIG welding in the 19th century
The principles of MIG welding were first developed at the beginning of the 19th century when Humphry Davy first discovered the electric arc. While MIG welding first used carbon electrodes, it was then found that metal electrodes are better for them by C.L. Coffin and N.G. Slavianoff.
MIG welding in the 20th Century
By the year 1920 the early predecessor of GMAW was first invented by P.O. Nobel of General Electric. It used a direct current and a bare electrode wire, as well as an arc voltage to regulate the feed rate. However, it did not use a shielding gas to protect the weld since the developments in welding atmospheres didn’t take place till further down the line. While it still wasn’t suitable for practical use, the forerunner of GMAW was released in 1926.
MIG Welding was officially developed by the Batelle Memorial Institute in 1948. This MIG welding process used a smaller diameter electrode and constant voltage power source. It also relied on an aluminum continuous fed electrode and an argon gas shielding gas.
The short arc variation of MIG / GMAW welding was released between the years of 1958 – 59 and increased welding versatility while making thin material welds possible. It also became the most popular MIG variation. One year after the short arc variation was developed the spray arc variation was developed. Spray arc variation was developed when experimenters added small quantities of oxygen to inert gasses.
In the 1970s additional development for MIG welding were found which allowed or improvements in both the GMAW – P and GMAW processes.
Now, however, MIG welding (or GMAW as it’s more widely known) is used widely by the sheet welding and automobile industries. Within these industries it’s used to perform arc spot welding, which allows it to replace resistance spot welding and riveting. It is also popular in robot welding, where robots handle the work-pieces as well as the welding gun to quicken the manufacturing process.
It is, however, unsuitable for outdoor welding since the movement of the surrounding atmosphere causes dissipation of the shielding gas, which makes welding with it difficult.
What are the advantages of MIG welding?
MIG / GMAW / MAG does yield a few advantages to those who use it. Below are a few examples of benefits offered by MIG welding.
MIG welding doesn’t use a flux so there is very little chance for the entrapment of slag in the weld metal; this results in the production of very high quality welds.
What are the disadvantages of MIG welding?
Doesn’t work very well with thick metals because it doesn’t provide enough penetration for them.
Less portable than welding types that don’t require an external shielding gas.
Not to mention that since it uses a shielding gas it can take a little more time to change which results in welds taking more time to complete.
Less controlled than TIG welding
It takes a while to clean metals well enough for them to be MIG welded. This is necessary to make sure that you’re safe when using a MIG welder as well as for making sure you get a good weld.
MIG welding a bit more expensive than other methods of welding as well as more complex to perform.
MIG welding has limited positions. The viscousity of the MIG welding metal puddle and the heat input of the MIG welder means that it can’t be used for either overhead or vertical welding.
What are the components of a MIG welding machine?
The great thing about the whole MIG welding process is that it is fairly simple. The part that makes it so simple is that it doesn’t require very many parts-there’s just 4.
Welding Machine
First you have the actual welding machine. The welder carries with it a spool of wire (consumables) and a variety of rollers which puch the wire out of the welding gun. Before you begin welding it helps to actually go through your machine and make sure you have a solid understanding of it’s inner workings. The type of wire loaded into the welder depends on the type of material that will be welded. For instance, if you’re trying to weld aluminum, then you will load aluminum wire into the machine.
Next we have the gas tank. The tank will be filled with either entirely Argon or will contain a mix of C02 and Argon. The purpose of this mixture is pretty straightforward-it’s meant to protect your weld from the harmful contaminants in the environment. Before you begin to weld it’s important that you open up the machine and check that there is some actual gas in the tank. It’s a good rule of thumb to make sure that your gauges are reading somewhere between 0 and 2500 PSI and that your regulator reads between 15 and 25 PSI.
Welding Gun
The most important part of the welding machine isn’t the machine itself it’s the gun – this is where the business actually starts. The welding gun is made of a trigger that handles both the wire feed and the current of electricity. Make sure that the outside of your gun is covered by either a ceramic or metal cup which will protect the electrode and direct the flow of gas out of the gun.
Ground Clamp
Lastly we have the ground clamp. The purpose of the ground clamp is to provide a negative charge (cathode)( to the welding project. This item should be clipped onto either the project or directly on a welding table- just be sure that it maintains some kind of connection with your work.
One of the outstanding myths that surround the MIG welding professions is that it’s extremely dangerous. Yes, that can be true, if you don’t have the proper safety gear when you participate in the activity. That brings us to the next part of the guide, ensuring that you have the correctly MIG welding safety gear.
1. Wear Safety Gear
Since MIG welding is a light intensive activity it can be incredibly harmful to one’s eyes and skin if they are not properly protected. The first piece of gear that every welder should have (regardless of the activity) is a welding helmet. The most effective type of welding helmet is the Auto Darkening welding helmet because of it’s ability to automatically adjust to the bright flares of light that will likely occur when you begin welding.
Next we have the welding gloves. These are important because of the splattering that will occur when you begin welding. The thickness of the gloves is entirely up to you but, it’s important that your gloves are made from some type of leather material.
As for body gear it doesn’t matter if you wear leathers or not – just make sure that whatever clothes you do wear are flame retardant. At the very least wear clothing that is made from some type of cotton material.
2. How to prep for MIG welding?
As for footwear all I can say is make sure it’s made from a leather material and is thoroughly layered. Shoes that are made from a synthetic material or contain a mesh of some type will likely be destroyed as splatter falls on them.
3. Don’t weld galvanized steel
Long story short, galvanized steel has properties that develop into carcinogenics once heated. Don’t weld this material if you want to stay relatively healthy while you weld.
4. Beware of fire
Welding produces splatter that can land relatively far from the weld itself. Make sure that there are no nearby materials that could easily catch if the splatter were to land on it.
How do you lay a bead in MIG welding?
The most important piece of knowledge you can have as a MIG welder is the ability to actually lay a bead. Make sure that you have a solid understanding of the power settings on your welder so that you can easily weld a proper bead on your machine. Too much power and the bead won’t look right =. Too little power and the bead won’t look right =. Practice laying the bead before you actually try and weld anything of value.
The easiest way to do this is by practicing laying relatively short beads, about 1 to 3 inches thick. Doing this a few times allows you to get your bearings on the machine and to also preserve consumables.
[thrive_text_block color=”red” headline=”Setting the settings on the welder”] [/thrive_text_block]
This is something that you get entirely by feel. If your welding activities are causing your workstation or metal to have holes formed inside of it then it is very likely that the machine is set too high. If you’re welding in spurts then the machine isn’t set high enough. Just keep adjusting it until you get the right settings. Once your welds start coming out nice and smooth you know that you have the correct settings.
[thrive_text_block color=”red” headline=”Avoid these issues”] [/thrive_text_block]
With any activity you are likely to run into some type of problem. The same goes for MIG welding.
What are common issues of MIG welding?
Not enough gas in the machine: you can tell this is happening when the weld begins to turn brown or some other darkish color.
Weld isn’t penetrating: when the weld is weak and the metals aren’t fully joining this is the common issue.
Holes appear in the weld: When you are welding with much power this is likely to occur
There is too much metal in the weld: This typically only happens when there is too much wire coming out of the gun. AN easy fix would be slowing down your wire speed.
Wire is fused to the tip: A common problem is that the wire in a gun fuses to it’s tip. This typically happens when you are A. welding to close to the material or B. are allowing too much heat to build up in the tip of your welding gun.
The steps to fix this problem are listed below:
Unscrew the cup of the welding shield
Unscrew the tip
Replace the tip
Screw the tip on
Replace the welding cup
Voila, it’s fixed
Replace the wire feed to gun
Another common issue that you will likely face is getting the wire stuck in the machine. This can be avoided by checking the spool and the rollers because this is generally where the material will get stuck.
If in fact the material does get stuck in the gun, you can do this to fix it
Power off and unplug the machine
Find the jam
Cut the material out with a pair of wire cutters
Pull out the wire from the hose with a pair of pliers
Replacve the tension bolt
Turn the machine on and depress the trigger. This is how you know if you fixed the gun or not. Once the wire comes out you know the gun is fixed.
A few decades ago someone had the genius idea to create welding helmets that shielded the user’s eyes from the bright and somewhat harmful flares of light, and slag that appears during most types of welding activities. The initial welding mask featured an LCD shutter that would immediately darken when it detected the bright light of the welding arc. The introduction of this filter into the design of the mask reduced both welding time and the level of risk that the welder takes on when they decide that it’s time to begin welding. The great thing about the introduction of this auto-darkening welding helmet technology is that it gave others something to build upon. Innovative geniuses (much like the one who developed this helmet) decided that it would be a great idea to build upon the initial design of the auto-darkening helmet and create designs of their own. This is where we come in. Great designs for auto-darkening helmets are being put out everyday. In our effort to make sure that you are aware of the best (and sometimes worse) designs we have decided to put together a holistic review based entirely on auto darkening welding helmets. This review does more than simple go over the features that make up a good auto darkening welding helmet; it talks about the history of the helmet design, features included, and the way to use the helmet. Read on to find the reviews.
Below are the welders we review
Since the helmets are auto-darkening I’m sure that you would like to know how quickly the material in the helmet can switch between being light and dark. (I’m sure you wouldn’t want to wait for hours for the material to lighten back up after going dark initially.) What does switching time mean? It’s simply the time a helmet takes to transition from natural light to the darkened shade used when the torch is lit up. A fast switching speed should be desired over a slow one. A fast switching welding helmet will provide you with the least amount of exposure to the UV and infrared rays that result from your welding arc. Professional helmet lenses can darken at the speed of 1 / 16,000 of a second, while entry-level helmets typically have a switching speed of 1 / 3,600 of a second and up. As you get to a fast switching speed you generally see the price go up alongside it.
Heaviness of helmet
Light helmet = less body stress = more efficient work. You want to reduce stress and reduce pressure. A light helmet will reduce head, neck, and body stress thus reducing fatigue allowing you to work more efficiently and for a longer duration. Stress on the body can cause frequent breaks, dehydration, muscle tightening, etc. Aim for a goal of purchasing an auto darkening helmet with a weight of at most 10 pounds. Most of our recommended helmets are below that, so you should be okay.
Viewing size
Viewing size refers to the helmet viewing area that you look through when conducting welding jobs. Typically you will find a welding helmet view size of 5 square inches up to 10 square inches. It is typically recommended for professional welders to get a larger view port, while hobbyists get smaller ones simply to keep their budget in mind. Your view port will determine how easy it is for you to see while working, smaller viewing size helmets tend to be more difficult (I know, stating the obvious right?).
ANSI approval
National safety standards exist for welders and there are certain codes your equipment should be equal with. Don’t be a cheapskate and purchase a piece of equipment that introduces you to more long-term health risk. ANSI Z87.1 – 2003 is the newest safety standard for welders. Follow it, know it, and respect it. It has set a mandate that auto-darkening lens manufacturers will need to confirm their claimed specs (transition speed, dark shade settings, etc) with lab tests that are available to the consumer.
Number of sensors
Absolutely invest in a helmet that has a good number of sensors. Why? You ask? The number of sensors is directly related to the speed and amount of protection you have in case of spark or flame. You want to aim for 4 sensors to have on your welder helmet, but two will work (although not preferred). To reduce potential exposure, if you are awelder that frequently works on your back or side, go with the 4 sensors. If you traditionally work in a normal position you are exposed to less risk and can thus explore going with 2 sensor helmets.
[thrive_text_block color=”red” headline=”Things to keep in mind when choosing your welding helmet”] [/thrive_text_block]
Firstly, you need to realize that every individual has a different preference towards the specifications of their helmet such as weight, sensitivity, etc. Ultimately, you want the perfect balance between safety, comfort, and results. Once you understand that not every individual wears the same type of helmet, you’ll be well on your way to finding the best welding helmet for you.
When deciding on what welding helmet is best for you, one absolutely crucial part is the amount of protection being provided to your face. You certainly need your full face covered no questions asked, and you need a helmet made out of material that is capable of shedding any molten fragment material.
A well-dimensioned viewing area through your welding mask is extremely important. Generally, welders look for semi-long periods of time, so a small viewing port will be difficult to work with. A small viewing area may result in having to position your head or back in poor ways resulting in posture issues, unnecessary body strain, or flipping up the helmet frequently which slows down the speed of your work.
Location of helmet controls is also another important thing that is often overlooked. Why’s this important? Well, let’s consider that if the controls are internal controls, you’re going to need to likely remove your helmet in order to make adjustments. This slows down your work and can become annoying quite quickly. External controls are nice, but they too have their flaws in that they can be damaged by airborne debris.
Welding Helmet Reviews
Antra AH6-260-0000
At the time of writing this review, the Antra AH6-260 is rated over 4.5 stars by our editor. It comes with an auto shut off/on functionality that is fully automatic. A unique feature to this helmet is the fact that it comes with an adjustable darkness setting that you can tailor to your own needs. Not only does the Antra AH6-260 work for welding, but it’s also versatile enough to withstand plasma cutting work. Measuring 9 x 8 x 12 with a weight of approximately 16 ounces (1 pound), it’s batteries included and capable of functioning with Plasma, Grinding, TIG, MIG, and ARC welding. Viewing specs of 3.86 x 1.78 inches and a variable shade inclusion of 4/5 – 9/9 – 13. While the price of the Antra AH6 may be somewhat low, it is by no means a “cheap welding helmet”.
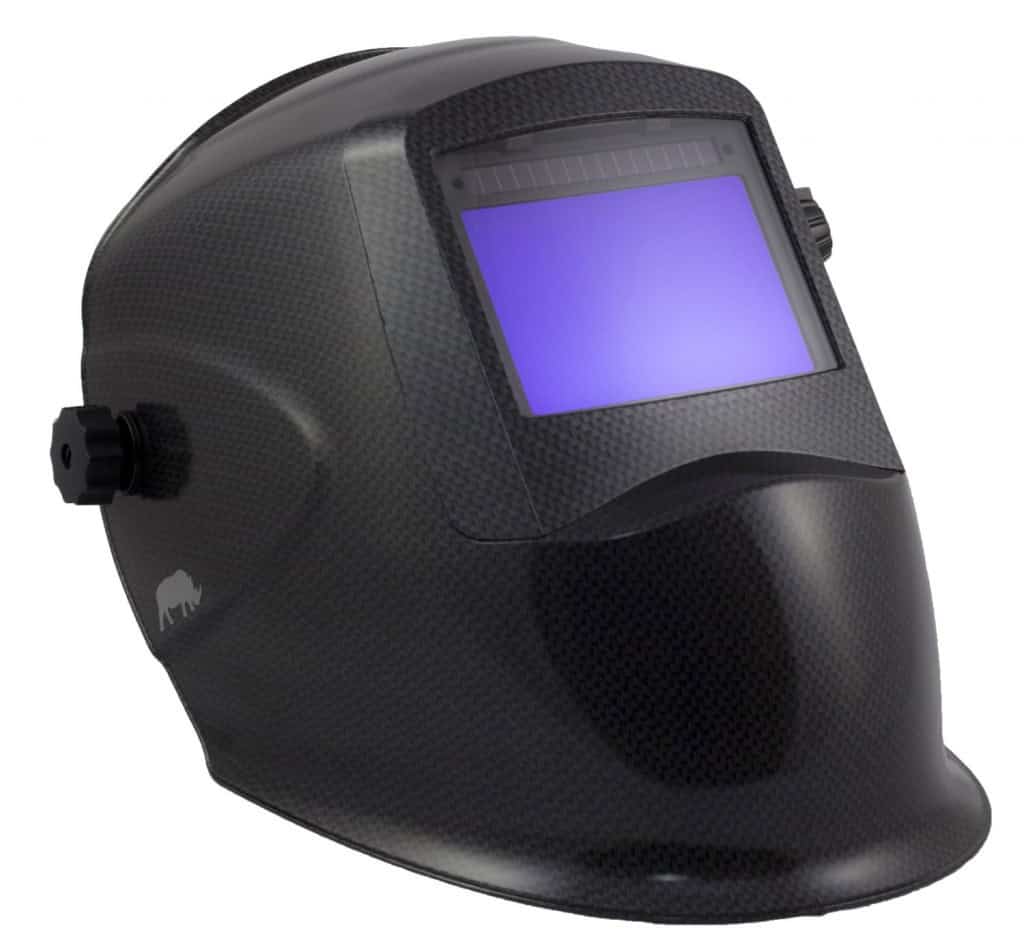
Rhino RH01
Weighing in at roughly 1 lbs 2 ounces the Rhino RH01 works great for SMAW, GMAW, PAC, FCAW, GTAW, and PAW welding. It features a switching speed of 1/25,000 of a second and is made of lightweight nylon shell. The RH01 is also known as the Rhino Large View + Grind Auto Darkening Helmet and features a massive 10 square inch viewing area. The headband has been known to loosen up at times, however, it also comes with a ratchet style headgear to aid in support. Replacement parts are extremely easy to find making this a popular addition to any welders equipment stock. Ah, one last thing – it’s also solar powered and features2 arc sensors!
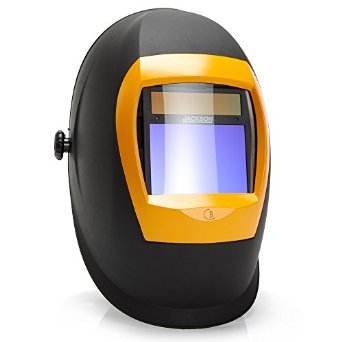
Jackson Safety W70 BH3
The W70 BH3 is among the most expensive helmet you’ll find on our list today, but it stands out amongst the competition in terms of clarity and light diffusion. Essentially, you get what you pay for with this particular product. Featuring an auto-on filter designed for auto darkening, it weighs in at roughly 2.1 lbs and provides superb protection for MIG,TIG, and ARC welding scenarios. A switching speed of 0.15 microseconds makes it extremely fast! Dimensions measure at 12 and a quarter inch x 9 and five-eighths x 9 and three-quarters inches with an EN379 rating of 1/1/1/1. That is fantastic, I am particularly fond of the viewing port on this helmet which helps aid in preparation ease and speed.
3M Speedglas 9100
If you’re looking to step your game up and weld like the pros the 3M Speedglas 9100 is probably the best bet for you. This welding helmet comes with a bundle of features such as the 3 sensors, Auto shut off capabilities, dual lenses, side shields. The switch speed of the Speedglas 9100 ranges from 40 to 800 ms, making it a decent choice by all welders standards. Another plus of this helmet is that it weighs in at only 20.2 oz, which reduces the fatigue you feel after a long day of using it. The feature I found to be the most useful is the solar-assisted sensor. This aspect basically saves both the battery life (reducing the effect on your pockets) and aids in switching speed.
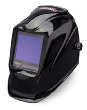
Lincoln Electric 3350
Weighing in at 20 oz the Lincoln Electric 3350 is the best welding helmet for those who require something that’s both easy on the pockets and the neck. The Lincoln Electric 3350 features internal shade controls as well as 3 different sensitivity controls: variable shade, delay, light sensitivity. The viewing screen on the this helmet measures at 3.74 in x 3.34 in. Considering the low price the features included are kind of over-justified, For instance, I’ve rarely ever seen a model in this price range include 3 different sensitivity types nor this many sensors. Of course, every decent product must have its downsides as well. The Lincoln Electric 3350’s lenses have a tendency to get scratched easily if cleaned with a rough material – make sure to clean it with a thin and porous nature such as linen.
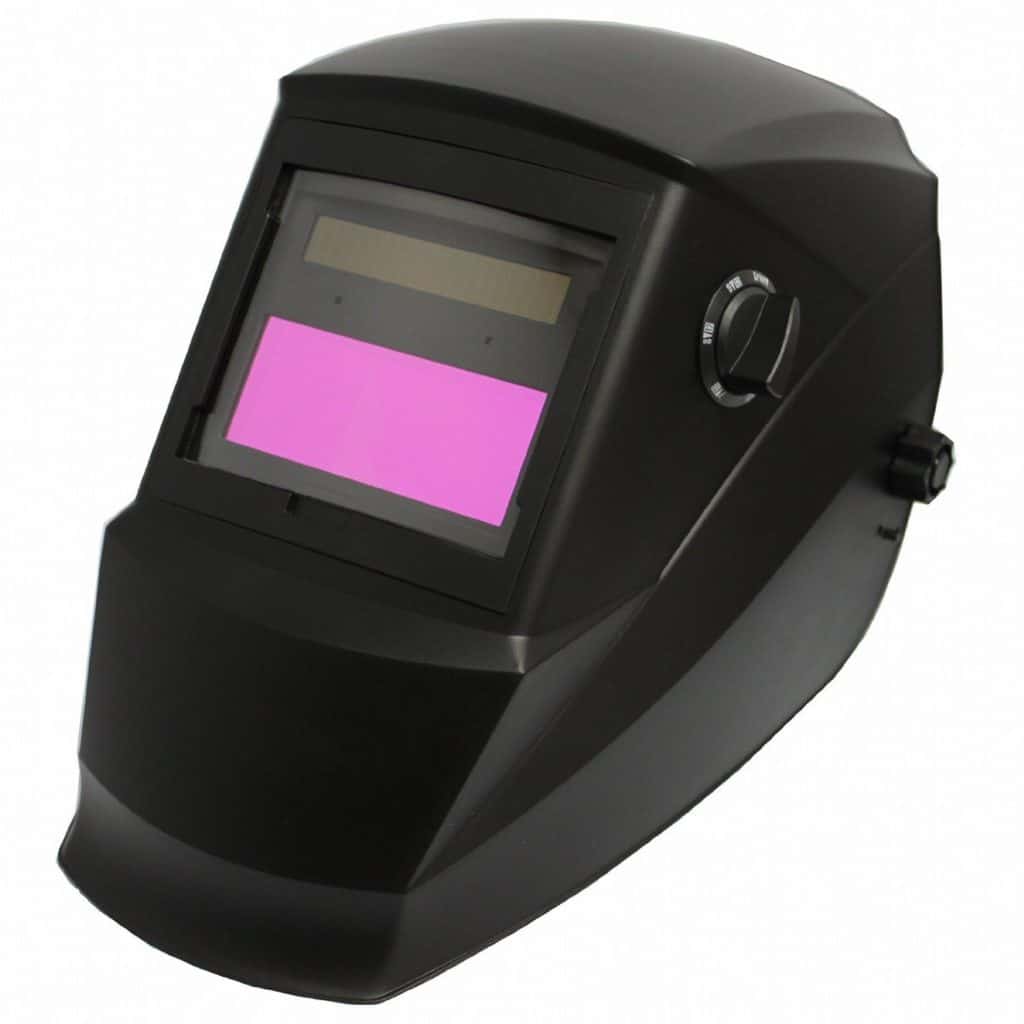
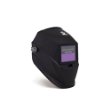
Miller 251292
Considering that it’s one of the least expensive welding helmets on this guide, the Miller 251292 kind of surprised me. First off, it has 2 sensors, which isn’t really that outstanding considering that there are helmets on this guide with 3+ sensors. It has variable shade and light state sensitivity of #8-13 and light state #3. The view area on the Miller 251292 is 3.70 x 1.37 in and it weighs in at about 16 oz. While the viewing area may not be the largest you’ll see on a helmet, the associated weight more than makes up for it. In addition to it’s lightweight, the Miller 251292 meets high impact ANSI standards.
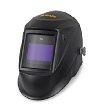
Hobart 770753
Last but not least we have the Hobart 770753. This helmet somehow manages to fall right in the middle when it comes to price and much like the previously mentioned helmet has features that make the low price stand out. This helmet features a Grind mode as well as an Auto shut off feature. It’s also approved by the ANSI which basically means that you will be receiving an item that has been tested for its ability to actually provide you with protection during a weld. The switch delay on the Hobart 770753 is between .1 and 1 seconds depending on the settings. The best thing about this particular helmet are it’s sensitivity controls and its ability to adjust to a multitude of light conditions.
How do you use a welding helmet
https://www.youtube.com/watch?v=ZUPYBOMWidg
Video credits to ChuckE2009. It discusses how to use a welding helmet.
Welding Helmet Common Questions
What is a passive style welding helmet?
Let’s start off by saying, that generally speaking a passive welding hood isn’t something we would suggest for a beginner welder. However, most experienced welders will generally have no problem using them. In general, we recommend not to use these for beginners because they will have trouble seeing the electrode part of the torch (yeah, you learn with experience).
About the only benefit to a passive welding mask is that they are cheap and affordable, however to us the risk of injuries and difficulty for a newbie just isn’t worth it.
What is a filter lens for a welding helmet?
A filter lens is the part of a welding helmet used to protect the welder’s eyes. They are a crucial part of a helmet because they’re responsible for protecting your eyes from the UV and infrared light exposure. We call these key non-impact dangers that a welder is susceptible to.
How long do most auto-darkening welding helmets last?
There is no exact length of time. However, factors that can influence helmet lifetime include, but are not limited to:
The quality used for the helmet material
How well you take care of the helmet
How often you use the helmet
How much should I expect to spend on my welding helmet?
We suggest at least $100 USD (as it wouldn’t be the best thing to get a cheap welding helmet), but here’s a better perspective on the price tiers you can expect.
$0 – $100 beginner helmets
$100 – $200 decent helmets
$200 -$300 good helmets
$300 + exceptional helmets
Are mask, hood, and helmet all synonyms for welding helmets? Are there any other common synonyms?
Yes, when you see any of these referenced in regards to welding they are all referring to the same thing. It’s confusing, but it’s something you should just become used to.
What’s the purpose of a welding helmet?
Arc Eye & Retina Burn Protection
Welding helmets are headgear utilized to perform different types of welding and to protect eyes, neck, and face from flash burn, sparks, UV light, heat, and infrared light. Ultraviolet emissions produced from welding arc can cause damages to exposed skin as well as eyes; hence, workers use helmets with filters called lens shades. Radiation, splashes, and gasses are hazardous to skin and eyes hence helmets are designed to protect welders from exposure to these hazards. They are used to prevent retina burns and arc eye which are caused by too much exposure to the sparks. They are usually used with arc welding processes such as gas tungsten welding, shielded metal welding, and gas metal welding. A decent welding helmet is crucial for welders and apart from the additional safety precautions, a helmet could help with overall welding performance. Welding helmets are available in a variety of optical densities particularly designed to filter the light intensity produced by the arc.
What’s the history of welding helmets?
The Evolution Of Welding Helmets
Welding can be traced back to the ancient times as early as the Bronze Age. During this age, small gold boxes were used and are estimated that these gold boxes were made more than 2000 years ago. The Egyptians and the eastern Mediterranean people learned the art of welding iron pieces together during the Iron Age. Further, the art of blacksmithing became popular during the middle ages and iron items were produced by hammering. Welding has been done since the Bronze Age, however, using of welding helmets came only in 1905. Frederick M. Bowers was the man who invented the first welding helmets. He got the inspiration to make welding helmets when he saw that welders in his hometown needed improved protection while working in ships, pipelines, and railroads. He founded the Fibre-Metal Products Company and manufactured the first ever welding helmet in 1905. Later, the company pioneered in the production of face shields, fiber metal caps, and goggles. Industrial Revolution demanded more welders in the 1930s; therefore, welders used face masks and goggles to protect themselves. However, the proper use of welding helmets started only in the year 1937. The early helmets were simple with a polarized lens or dark tinted glass without UV radiation filter. During the First World War, the high demand for weapons production pressured companies to manufacture electrodes and welding machines. This may have further influenced for the establishment of new welding helmet manufacturers. Later, welding helmets kept developing with better technologies and the first auto darkening helmet was introduced. In the 1940s the most recent type of welding helmet was introduced and since then it has evolved significantly. In 1981, Swedish manufacturing company Hornell created the first auto darkening welding helmets under the brand name Speedglas. In 2004, the company Hornell was taken over by another welding helmet company called 3M. In addition, Frederick M. Bower’s company Fibre-Metal Products Company was sold to North Safety Products in the year 2005. Today, both companies manufacture and sell standard helmets as well as auto-darkening helmets. 3M Company was previously known as the Minnesota Mining and Manufacturing Company. Today, it operates in more than 67 countries across the globe. Some of the best-renowned welding helmet manufacturers today are the Miller Electric, Lincoln Electric, 3M, Jackson, and Hobart.
What are the types of welding hoods?
Standard or Passive Welding Helmets
This type of welding helmet is made of molded plastics and is coated with infrared lights. The shield is durable and its extended front protects users from physical hazards. One can clearly view various angles and is also provided with adjustable sensitivity. They are popular for being cheaper than auto-darkening welding helmets. Generally, they come with a 10 lens shade that does not change whether a welder is welding or not. They give effective protection and is easy to put and easy to take off as well.
Auto-darkening Welding Helmets
Auto-darkening welding helmets are lightweight and designed to minimize neck discomfort. When a welder strikes the arc, these helmets automatically darken and many injuries have been reduced by Auto-darkening helmets. They are proved to be especially useful for modern welders working under poor light conditions. It comes in three different types, the fixed lens shade, professional and intermediate, and battery and solar powered. These helmets are designed to have light sensors present near the lens that helps welders in viewing like sun-glass shade. The sensors are utilized in order to get better coverage. This type of welding helmets is known to be the best ones which also provide clear vision. In the professional and intermediate helmet, the amount of brightness depends on the intensity of the lens. The brightness will be dimmer if the intensity is lower. Battery helmets are rechargeable as it is made of lithium and it can be charged in the sunlight because of the solar panels. The solar panel supplies backup power if the battery suffers low power. Solar power helmets are known to be most useful while working outside and battery-powered helmets for underground or inside large structures. Both utilize the sensors in order to identify when the light brightens, and when it is time to adjust the glass in the face shield to block only the right amount of light. Auto-darkening helmets basic models develop darker shade with any contact to arc light no matter where the light comes from. Auto-darkening deluxe model helmets have special sensors that can detect the difference between a co-workers arc and operator’s arc. The advantage of an auto-darkening welding helmet is that it allows the welder to accurately see the area that needs to be welded. The lenses are available in glass as well as plastic, and glass lenses are said to be better for not containing color distortions. It is known that a conventional welding helmet can blind a welder if the welder is too abruptly welding and killing the arc, leaving the welder in total darkness and vulnerable to fall or harm. This is why many construction companies at present require welders to use auto-darkening helmets.
A few decades ago someone had the genius idea to create welding helmets that shielded the user’s eyes from the bright and somewhat harmful flares of light, and slag that appears during most types of welding activities. The initial welding mask featured an LCD shutter that would immediately darken when it detected the bright light of the welding arc. The introduction of this filter into the design of the mask reduced both welding time and the level of risk that the welder takes on when they decide that it’s time to begin welding. The great thing about the introduction of this auto-darkening welding helmet technology is that it gave others something to build upon. Innovative geniuses (much like the one who developed this helmet) decided that it would be a great idea to build upon the initial design of the auto-darkening helmet and create designs of their own.
This is where we come in. Great designs for auto-darkening helmets are being put out everyday. In our effort to make sure that you are aware of the best (and sometimes worse) designs we have decided to put together a holistic review based entirely on auto darkening welding helmets. This review does more than simple go over the features that make up a good auto darkening welding helmet; it talks about the history of the helmet design, features included, and the way to use the helmet. Read on to find the reviews.
Since the helmets are auto-darkening I’m sure that you would like to know how quickly the material in the helmet can switch between being light and dark. (I’m sure you wouldn’t want to wait for hours for the material to lighten back up after going dark initially.) What does switching time mean? It’s simply the time a helmet takes to transition from natural light to the darkened shade used when the torch is lit up. A fast switching speed should be desired over a slow one. A fast switching welding helmet will provide you with the least amount of exposure to the UV and infrared rays that result from your welding arc. Professional helmet lenses can darken at the speed of 1 / 16,000 of a second, while entry-level helmets typically have a switching speed of 1 / 3,600 of a second and up. As you get to a fast switching speed you generally see the price go up alongside it.
Heaviness of helmet
Light helmet = less body stress = more efficient work. You want to reduce stress and reduce pressure. A light helmet will reduce head, neck, and body stress thus reducing fatigue allowing you to work more efficiently and for a longer duration. Stress on the body can cause frequent breaks, dehydration, muscle tightening, etc. Aim for a goal of purchasing an auto darkening helmet with a weight of at most 10 pounds. Most of our recommended helmets are below that, so you should be okay.
Viewing size
Viewing size refers to the helmet viewing area that you look through when conducting welding jobs. Typically you will find a welding helmet view size of 5 square inches up to 10 square inches. It is typically recommended for professional welders to get a larger view port, while hobbyists get smaller ones simply to keep their budget in mind. Your view port will determine how easy it is for you to see while working, smaller viewing size helmets tend to be more difficult (I know, stating the obvious right?).
ANSI approval
National safety standards exist for welders and there are certain codes your equipment should be equal with. Don’t be a cheapskate and purchase a piece of equipment that introduces you to more long-term health risk. ANSI Z87.1 – 2003 is the newest safety standard for welders. Follow it, know it, and respect it. It has set a mandate that auto-darkening lens manufacturers will need to confirm their claimed specs (transition speed, dark shade settings, etc) with lab tests that are available to the consumer.
Number of sensors
Absolutely invest in a helmet that has a good number of sensors. Why? You ask? The number of sensors is directly related to the speed and amount of protection you have in case of spark or flame. You want to aim for 4 sensors to have on your welder helmet, but two will work (although not preferred). To reduce potential exposure, if you are awelder that frequently works on your back or side, go with the 4 sensors. If you traditionally work in a normal position you are exposed to less risk and can thus explore going with 2 sensor helmets.
[thrive_text_block color=”red” headline=”Things to keep in mind when choosing your welding helmet”] [/thrive_text_block]
Firstly, you need to realize that every individual has a different preference towards the specifications of their helmet such as weight, sensitivity, etc. Ultimately, you want the perfect balance between safety, comfort, and results. Once you understand that not every individual wears the same type of helmet, you’ll be well on your way to finding the best welding helmet for you.
When deciding on what welding helmet is best for you, one absolutely crucial part is the amount of protection being provided to your face. You certainly need your full face covered no questions asked, and you need a helmet made out of material that is capable of shedding any molten fragment material.
A well-dimensioned viewing area through your welding mask is extremely important. Generally, welders look for semi-long periods of time, so a small viewing port will be difficult to work with. A small viewing area may result in having to position your head or back in poor ways resulting in posture issues, unnecessary body strain, or flipping up the helmet frequently which slows down the speed of your work.
Location of helmet controls is also another important thing that is often overlooked. Why’s this important? Well, let’s consider that if the controls are internal controls, you’re going to need to likely remove your helmet in order to make adjustments. This slows down your work and can become annoying quite quickly. External controls are nice, but they too have their flaws in that they can be damaged by airborne debris.
Welding Helmet Reviews
Antra AH6-260-0000
At the time of writing this review, the Antra AH6-260 is rated over 4.5 stars by our editor. It comes with an auto shut off/on functionality that is fully automatic. A unique feature to this helmet is the fact that it comes with an adjustable darkness setting that you can tailor to your own needs.
Not only does the Antra AH6-260 work for welding, but it’s also versatile enough to withstand plasma cutting work. Measuring 9 x 8 x 12 with a weight of approximately 16 ounces (1 pound), it’s batteries included and capable of functioning with Plasma, Grinding, TIG, MIG, and ARC welding. Viewing specs of 3.86 x 1.78 inches and a variable shade inclusion of 4/5 – 9/9 – 13. While the price of the Antra AH6 may be somewhat low, it is by no means a “cheap welding helmet”.
Rhino RH01
Weighing in at roughly 1 lbs 2 ounces the Rhino RH01 works great for SMAW, GMAW, PAC, FCAW, GTAW, and PAW welding. It features a switching speed of 1/25,000 of a second and is made of lightweight nylon shell. The RH01 is also known as the Rhino Large View + Grind Auto Darkening Helmet and features a massive 10 square inch viewing area. The headband has been known to loosen up at times, however, it also comes with a ratchet style headgear to aid in support. Replacement parts are extremely easy to find making this a popular addition to any welders equipment stock. Ah, one last thing – it’s also solar powered and features2 arc sensors!
Jackson Safety W70 BH3
The W70 BH3 is among the most expensive helmet you’ll find on our list today, but it stands out amongst the competition in terms of clarity and light diffusion. Essentially, you get what you pay for with this particular product. Featuring an auto-on filter designed for auto darkening, it weighs in at roughly 2.1 lbs and provides superb protection for MIG,TIG, and ARC welding scenarios. A switching speed of 0.15 microseconds makes it extremely fast! Dimensions measure at 12 and a quarter inch x 9 and five-eighths x 9 and three-quarters inches with an EN379 rating of 1/1/1/1. That is fantastic, I am particularly fond of the viewing port on this helmet which helps aid in preparation ease and speed.
3M Speedglas 9100
If you’re looking to step your game up and weld like the pros the 3M Speedglas 9100 is probably the best bet for you. This welding helmet comes with a bundle of features such as the 3 sensors, Auto shut off capabilities, dual lenses, side shields. The switch speed of the Speedglas 9100 ranges from 40 to 800 ms, making it a decent choice by all welders standards. Another plus of this helmet is that it weighs in at only 20.2 oz, which reduces the fatigue you feel after a long day of using it. The feature I found to be the most useful is the solar-assisted sensor. This aspect basically saves both the battery life (reducing the effect on your pockets) and aids in switching speed.
Lincoln Electric 3350
Weighing in at 20 oz the Lincoln Electric 3350 is the best welding helmet for those who require something that’s both easy on the pockets and the neck. The Lincoln Electric 3350 features internal shade controls as well as 3 different sensitivity controls: variable shade, delay, light sensitivity. The viewing screen on this helmet measures at 3.74 in x 3.34 in. Considering the low price, the features included are kind of over-justified. For instance, I’ve rarely ever seen a model in this price range include 3 different sensitivity types nor this many sensors. Of course, every decent product must have its downsides as well. The Lincoln Electric 3350’s lenses have a tendency to get scratched easily if cleaned with a rough material – make sure to clean it with a thin and porous nature such as linen.
Miller 251292
Considering that it’s one of the least expensive welding helmets on this guide, the Miller 251292 kind of surprised me. First off, it has 2 sensors, which isn’t really that outstanding considering that there are helmets on this guide with 3+ sensors. It has variable shade and light state sensitivity of #8-13 and light state #3. The view area on the Miller 251292 is 3.70 x 1.37 in and it weighs in at about 16 oz. While the viewing area may not be the largest you’ll see on a helmet, the associated weight more than makes up for it. In addition to it’s lightweight, the Miller 251292 meets high impact ANSI standards.
Hobart 770753
Last but not least we have the Hobart 770753. This helmet somehow manages to fall right in the middle when it comes to price and much like the previously mentioned helmet has features that make the low price stand out. This helmet features a Grind mode as well as an Auto shut off feature. It’s also approved by the ANSI which basically means that you will be receiving an item that has been tested for its ability to actually provide you with protection during a weld. The switch delay on the Hobart 770753 is between .1 and 1 seconds depending on the settings. The best thing about this particular helmet are it’s sensitivity controls and its ability to adjust to a multitude of light conditions.
How do you use a welding helmet
Video credits to MrAdkinsAuto. It discusses how to use a welding helmet.
Welding Helmet Common Questions
What is a passive style welding helmet?
Let’s start off by saying, that generally speaking a passive welding hood isn’t something we would suggest for a beginner welder. However, most experienced welders will generally have no problem using them. In general, we recommend not to use these for beginners because they will have trouble seeing the electrode part of the torch (yeah, you learn with experience).
About the only benefit to a passive welding mask is that they are cheap and affordable, however to us the risk of injuries and difficulty for a newbie just isn’t worth it.
What is a filter lens for a welding helmet?
A filter lens is the part of a welding helmet used to protect the welder’s eyes. They are a crucial part of a helmet because they’re responsible for protecting your eyes from the UV and infrared light exposure. We call these key non-impact dangers that a welder is susceptible to.
How long do most auto-darkening welding helmets last?
There is no exact length of time. However, factors that can influence helmet lifetime include, but are not limited to:
The quality used for the helmet material
How well you take care of the helmet
How often you use the helmet
How much should I expect to spend on my welding helmet?
We suggest at least $100 USD (as it wouldn’t be the best thing to get a cheap welding helmet), but here’s a better perspective on the price tiers you can expect.
$0 – $100 beginner helmets
$100 – $200 decent helmets
$200 -$300 good helmets
$300 + exceptional helmets
Are mask, hood, and helmet all synonyms for welding helmets? Are there any other common synonyms?
Yes, when you see any of these referenced in regards to welding they are all referring to the same thing. It’s confusing, but it’s something you should just become used to.
What’s the purpose of a welding helmet?
Arc Eye & Retina Burn Protection
Welding helmets are headgear utilized to perform different types of welding and to protect eyes, neck, and face from flash burn, sparks, UV light, heat, and infrared light. Ultraviolet emissions produced from welding arc can cause damages to exposed skin as well as eyes; hence, workers use helmets with filters called lens shades. Radiation, splashes, and gasses are hazardous to skin and eyes hence helmets are designed to protect welders from exposure to these hazards.
They are used to prevent retina burns and arc eye which are caused by too much exposure to the sparks. They are usually used with arc welding processes such as gas tungsten welding, shielded metal welding, and gas metal welding. A decent welding helmet is crucial for welders and apart from the additional safety precautions, a helmet could help with overall welding performance. Welding helmets are available in a variety of optical densities particularly designed to filter the light intensity produced by the arc.
What’s the history of welding helmets?
The Evolution Of Welding Helmets
Welding can be traced back to the ancient times as early as the Bronze Age. During this age, small gold boxes were used and are estimated that these gold boxes were made more than 2000 years ago. The Egyptians and the eastern Mediterranean people learned the art of welding iron pieces together during the Iron Age. Further, the art of blacksmithing became popular during the middle ages and iron items were produced by hammering. Welding has been done since the Bronze Age, however, using of welding helmets came only in 1905.
Frederick M. Bowers was the man who invented the first welding helmets. He got the inspiration to make welding helmets when he saw that welders in his hometown needed improved protection while working in ships, pipelines, and railroads. He founded the Fibre-Metal Products Company and manufactured the first ever welding helmet in 1905. Later, the company pioneered in the production of face shields, fiber metal caps, and goggles. Industrial Revolution demanded more welders in the 1930s; therefore, welders used face masks and goggles to protect themselves. However, the proper use of welding helmets started only in the year 1937.
The early helmets were simple with a polarized lens or dark tinted glass without UV radiation filter. During the First World War, the high demand for weapons production pressured companies to manufacture electrodes and welding machines. This may have further influenced for the establishment of new welding helmet manufacturers. Later, welding helmets kept developing with better technologies and the first auto darkening helmet was introduced. In the 1940s the most recent type of welding helmet was introduced and since then it has evolved significantly.
In 1981, Swedish manufacturing company Hornell created the first auto darkening welding helmets under the brand name Speedglas.
In 2004, the company Hornell was taken over by another welding helmet company called 3M. In addition, Frederick M. Bower’s company Fibre-Metal Products Company was sold to North Safety Products in the year 2005. Today, both companies manufacture and sell standard helmets as well as auto-darkening helmets. 3M Company was previously known as the Minnesota Mining and Manufacturing Company. Today, it operates in more than 67 countries across the globe. Some of the best-renowned welding helmet manufacturers today are the Miller Electric, Lincoln Electric, 3M, Jackson, and Hobart.
What are the types of welding hoods?
Standard or Passive Welding Helmets
This type of welding helmet is made of molded plastics and is coated with infrared lights. The shield is durable and its extended front protects users from physical hazards. One can clearly view various angles and is also provided with adjustable sensitivity. They are popular for being cheaper than auto-darkening welding helmets. Generally, they come with a 10 lens shade that does not change whether a welder is welding or not. They give effective protection and is easy to put and easy to take off as well.
Auto-darkening Welding Helmets
Auto-darkening welding helmets are lightweight and designed to minimize neck discomfort. When a welder strikes the arc, these helmets automatically darken and many injuries have been reduced by Auto-darkening helmets. They are proved to be especially useful for modern welders working under poor light conditions. It comes in three different types, the fixed lens shade, professional and intermediate, and battery and solar powered. These helmets are designed to have light sensors present near the lens that helps welders in viewing like sun-glass shade.
The sensors are utilized in order to get better coverage. This type of welding helmets is known to be the best ones which also provide clear vision. In the professional and intermediate helmet, the amount of brightness depends on the intensity of the lens. The brightness will be dimmer if the intensity is lower. Battery helmets are rechargeable as it is made of lithium and it can be charged in the sunlight because of the solar panels. The solar panel supplies backup power if the battery suffers low power. Solar power helmets are known to be most useful while working outside and battery-powered helmets for underground or inside large structures. Both utilize the sensors in order to identify when the light brightens, and when it is time to adjust the glass in the face shield to block only the right amount of light.
Auto-darkening helmets basic models develop darker shade with any contact to arc light no matter where the light comes from. Auto-darkening deluxe model helmets have special sensors that can detect the difference between a co-workers arc and operator’s arc. The advantage of an auto-darkening welding helmet is that it allows the welder to accurately see the area that needs to be welded.
The lenses are available in glass as well as plastic, and glass lenses are said to be better for not containing color distortions. It is known that a conventional welding helmet can blind a welder if the welder is too abruptly welding and killing the arc, leaving the welder in total darkness and vulnerable to fall or harm. This is why many construction companies at present require welders to use auto-darkening helmets.